Program
ReadIviewGTData
For
pulling out images from
iViewGT
version 3.4.1 data base
15
Jan 2018
Install the Intersolv Dbase
Drivers provided by Elekta
Install Microsoft Distributables
for 2013
Gantry
Angle Spacing for IMAT (VMAT)
Running
program ReadIviewQAData.exe
Introduction:
This
program is provided to replace IviewToDicom for the
version 3.4.1 (and later) of the Elekta iViewGT EPID system.
The program is written under the Elekta Vendor
Interoperability Program between Elekta and LifeLine Software.
The program will output integrated images in Dicom
format for the program Dosimetry Check to read.
Requirements:
The dll files provided by Elekta
require Microsoft .NET 4.5.2 or later.
This can be downloaded from Microsoft.
A license is required from Elekta
by the iViewGT system in order to enable the
communication between iViewGT and ReadIViewGTData.
Please contact your Elekta sales representative for
assistance with this license.
If you do not have the license, you will
not get images (our display of EPID images will all be blank) as the pixel
factor will a large negative encrypted number (see excerpt from example
_Frame.xml file below). The Elekta license part number required for Dosimetry
Decryption is MRT 27581 IVIEWGT,LINAC SPECIFIC LICENSE ACTIVATION, MATH RESOLUTIONS. The license is not for iCom,
it is for iViewGT.
Notes:
As the Elekta dll files were written in
C#, we could not use our extensive C++ library of functions. Consequently the program starts out as a
program in a command prompt window.
Further, the program does not work with the prior Elekta
EPID iViewGT data base, so you must continue to use IviewToDicom for that.
Note that the file IviewGTDirectory.loc is compatible with both
programs, so that you can have both an older iViewGT
system and the newer one.
Installation
Instructions:
Install
Zip file:
Unzip
the file ReadIviewGTData.zip into the folder c:\mathresolutions or where ever Dosimetry Check was installed.
Install
the Intersolv
Dbase Drivers provided by Elekta
Run the
program setup.exe that is in the folder IntersolvDBaseDriversInstaller.d.
If you
do not have the driver installed, you will get the error message:
Unhandled Exception: System.DllNotFoundException:
Unable to load DLL 'IviewReader.dll': The specified module could not be found.
(Exception from HRESULT: 0x8007007E).
Install
Microsoft Distributables
for 2013
If you
still get the above error message, install the Microsoft distributables
for 2013. We have provided in
sub-folder VCredist2013_x86.d the install program vcredist_x86.exe that was downloaded
from the Microsoft website.
IviewGTDirectory.loc
You must
add an entry to the existing file IviewGTDirectory.loc to point to the folder
where the 3.4.1 iViewGT data base is (the folder that
has .dbf files such as PATIENT.DBF). The
file IviewGTDirectgory.loc is in the program resources directory (pointed to by
the file rlresources.dir.loc in the current directory
holding the Dosimetry Check install), the resources
directory normally the folder c:\mathresolutions\rl.dir. A copy of the file will be in
c:\mathresolutions\ExampleFiles.d for you to move to rl.dir and edit if you
don’t have an existing file. The file is
self documenting.
An
example file is shown below:
/*
file format version */ 3
/*
number of systems to follow */ 2
/* for each system the
follow must follow: */
// description of system.
<*Elekta example
*>
//
path to the iviewGT files where PATIENT.DBF
is:
// if space in path, surround text string
with <* to *>
<*c:/home/wdrenner/iviewdbf.d/D4ChestiViewUPDATEDdb*>
//
translation of L, M, H, energy designations:
L 6
M
10
H
15
// directory for calibration images.
<*c:/home/wdrenner/Accfolder.d/Calibration.d*>
// directory for pre-treatment images
<*c:/home/wdrenner/Accfolder.d/PreTreatment.d*>
// directory for exit images
<*c:/home/wdrenner/Accfolder.d/Exit.d*>
// folder for inclinometer file
<*c:/home/wdrenner/Inclinometer.d*>
// description of the second system in this
example.
<*Ironwood example *>
//
path to the iviewGT files where PATIENT.DBF
is:
// if space in path, surround text string
with <* to *>
<*c:/home/wdrenner/iviewdbf.d/IronWoodNewDB_4.d*>
//
translation of L, M, H, energy designations:
L
6
M
10
H
15
// directory for calibration images.
<*c:/home/wdrenner/Accfolder.d/Calibration.d*>
// directory for pre-treatment images
<*c:/home/wdrenner/Accfolder.d/PreTreatment.d*>
// directory for exit images
<*c:/home/wdrenner/Accfolder.d/Exit.d*>
// folder for inclinometer file
<*c:/home/wdrenner/Inclinometer.d*>
The file follows the ASCII file format where // to end of line is a comment that the program does not read, and /* to */ is a comment that the program does not read. Data is separated by white space, and <* to *> defines a text string to be read as a single item.
The entries L, M, and H are not use by the new program, but are there for compatibility with IviewToDicom which also reads this file. Nor is the inclinometer required as the new data base will provide the gantry angles for VMAT images.
The new iViewGT data base evidently appears to have a provision for a user name and password. Should that be the case, the above IviewGTDirectory.loc file can be converted to file format version 4, and then add two text strings after the inclinometer data for each iViewGT entry:
<*user_name*> <*pass_word*>
To read a version 4 file IviewToDicom must be updated and is included in the zip file. Note to date, Elekta has not implemented a requirement for a user name and password and providing one will cause the interface to not work.
If you are not using AutoRunDC, the cal, pre, and exit folders entries can be empty:
<**> but the entries must be there.
Gantry Angles for IMAT (VMAT)
In the older iView version, one would hit iCom to download the fields. Then you would close iCom and turn on movie collection.
On 3.4.1, hit iCom and leave it there. If you close iCom, you will break the iCom connection and not get gantry information. Open, the iView system will automatically communicate with the LINAC in real time and pull in the gantry angles. After the beam has been delivered, then you can close the iCom. Then repeat this process for each beam (arc). After that archive as you would before. There is a very brief mention of this in the iView manual, but it is not clear.
ReadIviewQAData.exe will automatically combine images into composite images within 5 degree increments. The gantry angles are read from the file _Frame.xml in the iView data base.
Example path:
patient_DC123452/MV_IMAGES/img_1.3.46.423632.301779.1509045159.23/_Frame.xml
You want to see this:
<Frame>
<Seq>4</Seq>
<DeltaMs>1570</DeltaMs>
<HasPixelFactor>1</HasPixelFactor>
<PixelFactor>1.21205</PixelFactor>
<gantryAngle>-177.36607</gantryAngle>
<CumulativeBeamMU>5.5</CumulativeBeamMU>
<IsBeamMuValid>1</IsBeamMuValid>
</Frame>
not this:
<Frame>
<Seq>1</Seq>
<DeltaMs>0</DeltaMs>
<HasPixelFactor>1</HasPixelFactor>
<PixelFactor>0.0813101</PixelFactor> Note pixel
factor is not
<gantryAngle>-999.90002</gantryAngle> encrypted but there is no
<CumulativeBeamMU>0.0</CumulativeBeamMU>
valid gantry angle.
<IsBeamMuValid>0</IsBeamMuValid>
</Frame>
Gantry Angle Spacing for IMAT (VMAT)
The iViewGT system will create images for single frames. Each frame will be of the order of 2 degrees in rotation (from a single observation). This will result in a large number of beams to compute since Dosimetry Check creates a beam for each image at the gantry angle of the beam. The rotation of an arc is simulated by fixed beams at the gantry angles the images are integrated at.
The number of images, hence beams, may be reduced by combining frames close in angle. The spacing is specified in the program resources file IMATGantryAngleSpacing. A listing of an example file is shown below:
/*
format version */ 1
//
file to default minimum spacing of IMAT images by gantry angle in degrees
6
Note that a file with the contents of simply:
1 6
will be read the same. The format version is an integer, the value of which the user does not change as this number defines the contents of the file that is to follow to the program. The angle spacing is a floating point number. 6 or 6.0 will be read the same. Fractional numbers are allowed such as 5.4. The program simply continues to combine frames that define an iViewGT image as long as the angle spanned is less than or equal to the number specified in the file.
If the file does not exist, a default value of 5 degrees is assumed. As an example, if the frames are 2 degrees apart and the value is 5 degrees, then two frames will span 4 degrees whereas three frames will span 6 degrees. As 6 degrees is greater than 5 degrees, two frames will be combine that will span 4 degrees to make an integrated image. The total number of images for a 360 degree rotation will then be 360/4 = 90 images. Increasing the angle spacing to 6 as shown in the above example file will result in a smaller number of images produced. Trial and error will have to be relieved upon to produce a satisfactory number of images for a rotation. More images will increase the resolution of the calculation in regard to simulating a rotation, but will also increase the computational time. We recommend a span of about 5 degrees, which might require the number set to 6 in the file.
It should be noted that as the plan is not read by this program, it is not known if images are for a VMAT arc or for stationary beams. All frames found for the same image will be combined according to the spacing in gantry angle. Since an IMRT beam does not rotate, all its frames will be combined into a single integrated image.
Please note that after importing IMAT images into Dosmetry Check, that images can be combined to create a smaller number of images for computation. Select the beam to be edited on the Plan Toolbar, and under the Options pull down on the Beam Toolbar, select “Select IMAT images spacing...”. Review Beams in the Dosmetry Check reference manual for this feature.
Running program ReadIviewQAData.exe
You will need a new license to run this program. If you don’t have a license, the program will display the computer ID and prompt you to enter a license key.
You can run from DosimetryCheckTasks (but first time recommend you run from a command prompt window you bring up so that you will see all error messages):

Or bring up a command prompt window, either from “Other Utilities” on the above or run from the start menu and type in ReadIviewGTData.exe as a command.
Example run of the program:
And example is shown below:
c:\MathResolutions>ReadIviewGTData.exe
ReadIviewGTData version:
Version 1, Release 2, 15 Jan 2018
Gantry
angle spacing minimum for IMAT from file
c:\mathresolutions\rl.dir\IMATGantryAngleSpacing
is 6.0 degrees
Index iViewGT
description:
1 Elekta example
2 Ironwood example
Select
iViewGT system by index number: 2
patient count = 2
Index Patient:
1 Kxxxxxxx, KENT
197493
2 Pxxxxxxx, ROBERT
331830
Select
patient by index:
2
you
entered 2
For
patient: Pxxxxxx, ROBERT 331830
Treatment
sessions:
Index
1
20170819 LLL lung_mediastinum
2
20170824 LLL lung_mediastinum
Select
treatment by index:
1
If there are more than 50 patients, the program will stop scrolling after every 50 patients and give you the opportunity to select a patient or to continue to list the patients.
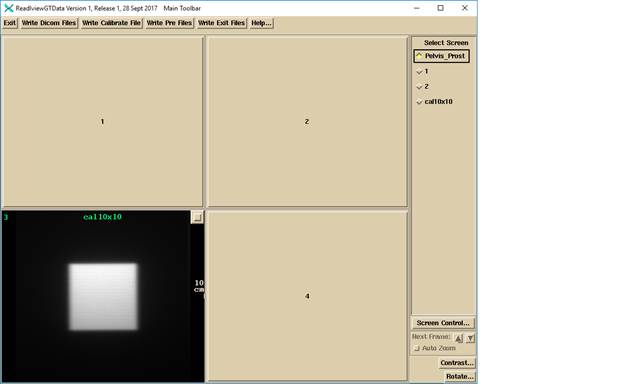
You will then get the application window shown below. Any single images or IMRT images will be in the first screen under the plan name. VMAT images will be shown in the further screens under the name of each beam (arc). Below the beams were named simply 1 and 2.
Composite images and not shown for VMAT, nor individual segments for IMRT images as is done in IviewToDicom.
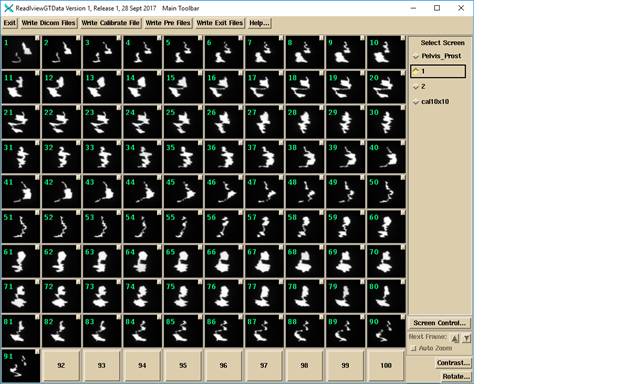
The VMAT images for beam 1 of the above case:
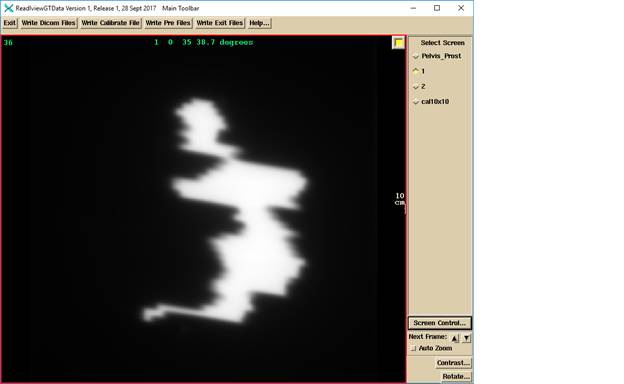
One of the VMAT frames selected to be full screen shown below. The label is beam name (1 in this case), followed by the image number, followed by the segment number, followed by the gantry angle. The frames are added together so that the images are in approximately 5 degree sub-arcs (frames closer than 5 degrees to each other are added, reducing the number of sub-arcs).
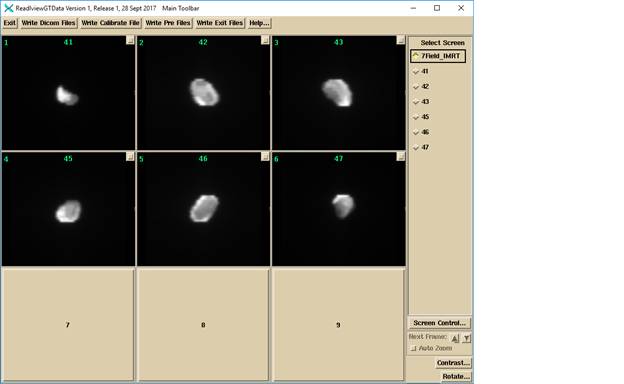
Below is an example of IMRT images:
c:\MathResolutions>ReadIviewGTData.exe
ReadIviewGTData version:
Version 1, Release 2, 15 Jan 2018
Gantry
angle spacing minimum for IMAT from file
c:\mathresolutions\rl.dir\IMATGantryAngleSpacing
is 6.0 degrees
1 Elekta example
2 Ironwood example
Select
iViewGT system by index number: 1
patient count = 3
Index Patients:
1 BTN_Thorax, FFS
000000445
2
cal Deliver Stored Beam
3
Deliver Quick Beam Deliver Quick Beam
Select
patient by index:
1
you
entered 1
For
patient: BTN_Thorax, FFS 000000445
Treatment
sessions:
Index Treatments
1 20150227
7Field IMRT no struc
2
20150227 VMAT off Centre no S
3 20150301 VMAT 2 Arcs
4 20150301 VMAT Spine FFF
5 20150301 VMAT 6MV FFF
6 20150301 VMAT off Centre no S
7 20150301 VMAT off Centre
8 20150301 IMRT 6MV FFF
9 20150301 7Field IMRT no struc
10 20150301 7Field IMRT
11 20150301 Simple 3D
12 20150301 Off Centre IMRT
13 20150716 VMAT 2 Arcs
14 20150806 Simple 3D
15 20150824 VMAT Spine FFF
Select
treatment by index:
1
Output Folder Directory:
Single and IMRT images will go into the directory:
Patient_name_ID\Date_of_EPID_images\plan_name_energy
And VMAT images will be in a sub-folder by the beam name.
Example:
BTN_Thorax_FFS_000000445/1_Mar_2015/VMAT_2_Arcs_06x
With two sub-folders 71.d and 72.d (in an example not shown above).